ひょんなことからDRBD を知った。
DRBD (Distributed Replicated Block Device) は、Linuxプラットフォームの分散ストレージシステム(「DRBD – Wikipedia」より引用)
以前、ZFS やGlusterFS も試した。ついでにRAID も。
GlusterFSは、スケーラブルなストレージのための汎用分散ファイルシステムの1つ。InfiniBandのRDMAやTCP/IPインターコネクトなどの各種ストレージを集約し、大規模並列ネットワークファイルシステムを構築できる(「GlusterFS – Wikipedia」より引用)
個人的にはGlusterFS が興味深い(下部の「注」参照)。もし、サーバーを構築したくないなら、今もReadyNAS が最も欲しい製品だ。
ただ、何にしても絶対というものは存在せず、どこかしらに障害点を残す。例えば、ディスクやデータに関して高信頼性を持つ環境を構築したとして、そのマシン自体がハードウェア的に壊れたらどうだろう。潤沢な資金があれば、複数の物理サーバーを用いてそのような問題にも対処できる環境を創れるだろうが、そうではない。維持費もかかるし。
そのような視点から考えると、物理的に異なるストレージサーバーを構築する必要がある。そのような問題を解決してくれるのがDRBD だ。
# もちろん、どのような構成であっても信頼性を高めるように構築することは可能だろうが
スポンサードリンク
テスト環境
プライマリとセカンダリの2台のマシンをUbuntu 12.04 LTS 64bit で構築してテストする。
- プライマリ / セカンダリ
- drbd23 / drdb24
- 192.168.1.23 / 192.168.1.24
- Ubuntu 12.04.1 LTS Server 64bit
- HDD 100GB
- NIC 100Mbps
VMware によって自動インストールされた環境は次の通り(これはプライマリもセカンダリも基本的に同一):
casey@drbd24:~$ sudo fdisk /dev/sda
 sudo: unable to resolve host drbd24

Command (m for help): p

Disk /dev/sda: 107.4 GB, 107374182400 bytes
 255 heads, 63 sectors/track, 13054 cylinders, total 209715200 sectors
 Units = sectors of 1 * 512 = 512 bytes
 Sector size (logical/physical): 512 bytes / 512 bytes
 I/O size (minimum/optimal): 512 bytes / 512 bytes
 Disk identifier: 0x0000147e

Device Boot      Start         End      Blocks   Id  System
 /dev/sda1   *        2048   207620095   103809024   83  Linux
 /dev/sda2       207622142   209713151     1045505    5  Extended
 /dev/sda5       207622144   209713151     1045504   82  Linux swap / Solaris
ディスクの割り当て
fdisk を利用して定義する。これは自信がまったくない。
casey@drbd23:~$  sudo fdisk /dev/sda
 sudo: unable to resolve host drbd23
 [sudo] password for casey:

Command (m for help): p
pを入力して領域を確認する。
Disk /dev/sda: 107.4 GB, 107374182400 bytes
 255 heads, 63 sectors/track, 13054 cylinders, total 209715200 sectors
 Units = sectors of 1 * 512 = 512 bytes
 Sector size (logical/physical): 512 bytes / 512 bytes
 I/O size (minimum/optimal): 512 bytes / 512 bytes
 Disk identifier: 0x0001b58b

Device Boot      Start         End      Blocks   Id  System
 /dev/sda1   *        2048   207620095   103809024   83  Linux
 /dev/sda2       207622142   209713151     1045505    5  Extended
 /dev/sda5       207622144   209713151     1045504   82  Linux swap / Solaris

Command (m for help):n
nを入力して新規の定義を行う。
Partition type:
 p   primary (1 primary, 1 extended, 2 free)
 l   logical (numbered from 5)
 Select (default p): p
 Partition number (1-4, default 3):
 Using default value 3
 First sector (207620096-209715199, default 207620096):
 Using default value 207620096
 Last sector, +sectors or +size{K,M,G} (207620096-207622141, default 207622141):
 Using default value 207622141

Command (m for help): p
pを入力して領域を確認する。
Disk /dev/sda: 107.4 GB, 107374182400 bytes
 255 heads, 63 sectors/track, 13054 cylinders, total 209715200 sectors
 Units = sectors of 1 * 512 = 512 bytes
 Sector size (logical/physical): 512 bytes / 512 bytes
 I/O size (minimum/optimal): 512 bytes / 512 bytes
 Disk identifier: 0x0001b58b

Device Boot      Start         End      Blocks   Id  System
 /dev/sda1   *        2048   207620095   103809024   83  Linux
 /dev/sda2       207622142   209713151     1045505    5  Extended
 /dev/sda3       207620096   207622141        1023   83  Linux
 /dev/sda5       207622144   209713151     1045504   82  Linux swap / Solaris

Partition table entries are not in disk order

Command (m for help): w
wを入力して書き込みを行う。
The partition table has been altered!

Calling ioctl() to re-read partition table.

WARNING: Re-reading the partition table failed with error 16: Device or resource busy.
 The kernel still uses the old table. The new table will be used at
 the next reboot or after you run partprobe(8) or kpartx(8)
 Syncing disks.
できたのだろうか。
The partition table has been altered!
翻訳によれば「パーティションテーブルは交換されました!」らしい。
WARNING: Re-reading the partition table failed with error 16: Device or resource busy.The kernel still uses the old table. The new table will be used at the next reboot or after you run partprobe(8) or kpartx(8) Syncing disks.
翻訳によれば「警告:再読み込みエラー16で失敗したパーティションテーブルを:デバイスもしくはリソースがビジー状態です。カーネルはまだ古いテーブルを使っています。新しいテーブルで使用されます。次回の再起動か、partprobeを実行した後(8)またはのkpartx(8)ディスクを同期させる。」らしい。
リロード
「partprobe」コマンドを利用すると再読み込みできるらしいので実行。
$ partprobe
インストール
DRBD をインストールする。
sudo apt-get install drbd8-utils
設定
設定ファイルを開く
sudo vi /etc/drbd.conf
デフォルト

# You can find an example in  /usr/share/doc/drbd.../drbd.conf.example

include "drbd.d/global_common.conf";
include "drbd.d/*.res";
デフォルトに追記
global { usage-count no; }
 common { syncer { rate 100M; } }
 resource r0 {
 protocol C;
 startup {
 wfc-timeout  15;
 degr-wfc-timeout 60;
 }
 net {
 cram-hmac-alg sha1;
 shared-secret "secret";
 }
 on drbd23 {
 device /dev/drbd0;
 disk /dev/sdb1;
 address 192.168.1.23:7788;
 meta-disk internal;
 }
 on drbd24 {
 device /dev/drbd0;
 disk /dev/sdb1;
 address 192.168.1.24:7788;
 meta-disk internal;
 }
 }
起動
起動してみる
casey@drbd23:~$ sudo drbdadm create-md r0
 sudo: unable to resolve host drbd23
 /etc/drbd.conf:6: conflicting use of global section 'global' ...
 drbd.d/global_common.conf:1: global section 'global' first used here.
引けないと怒られるので、hosts を編集することにした。
hosts 設定
プライマリ側
127.0.0.1       localhost
127.0.1.1       ubuntu
127.0.0.1       drbd23
192.168.1.24    drbd24
セカンダリ側
127.0.0.1       localhost
127.0.1.1       ubuntu
127.0.0.1       drbd24
192.168.1.23    drbd23
起動してみる
casey@drbd23:~$ sudo drbdadm create-md r0
 /etc/drbd.conf:6: conflicting use of global section 'global' ...
 drbd.d/global_common.conf:1: global section 'global' first used here.
なにか怒られたので、デフォルトで記載されていた部分をコメントアウトした。
起動してみる
casey@drbd23:~$ sudo drbdadm create-md r0
 open(/dev/sdb1) failed: No such file or directory
 Command 'drbdmeta 0 v08 /dev/sdb1 internal create-md' terminated with exit code 20
 drbdadm create-md r0: exited with code 20
なにかダメっぽいので、以下のコマンドをおまじない程度に実行してみる。
sudo dd if=/dev/zero bs=1M count=1 of=/dev/sda3; sync
しかしダメだった。よくよくみると、参考サイトのコピー・アンド・ペーストだったから、ディスクの指定が間違っていた。sda3 に書き換えた。
起動してみる
casey@drbd23:~$ sudo drbdadm create-md r0
 could not open with O_DIRECT, retrying without
 '/dev/sda3' is not a block device!
 Command 'drbdmeta 0 v08 /dev/sda3 internal create-md' terminated with exit code 20
 drbdadm create-md r0: exited with code 20
今度はブロックデバイスじゃないと怒られる。
再起動
システムを再起動してしまえ~
sudo reboot
あれ?直った?
casey@drbd23:~$ sudo drbdadm create-md r0
 [sudo] password for casey:
 Writing meta data...
 initializing activity log
 NOT initialized bitmap
 New drbd meta data block successfully created.
テーブルのリロードが正しく完了していなかったのが原因らしく、おそらくsudo が必要だったのだろう。
起動してみる
casey@drbd23:~$ sudo /etc/init.d/drbd start
 [sudo] password for casey:
 * Starting DRBD resources
(r0) 0: Failure: (112) Meta device too small.
[r0] cmd /sbin/drbdsetup 0 disk /dev/sda3 /dev/sda3 internal --set-defaults --create-device  failed - continuing!

s(r0) n(r0) ]..........
 ***************************************************************
 DRBD's startup script waits for the peer node(s) to appear.
 - In case this node was already a degraded cluster before the
 reboot the timeout is 60 seconds. [degr-wfc-timeout]
 - If the peer was available before the reboot the timeout will
 expire after 15 seconds. [wfc-timeout]
 (These values are for resource 'r0'; 0 sec -> wait forever)
 To abort waiting enter 'yes' [  14]:
 [ OK ]
OK と言っているけれど、「(r0) 0: Failure: (112) Meta device too small.」が気になる。
起動してみる(セカンダリ)
casey@drbd24:~$ sudo /etc/init.d/drbd start
 * Starting DRBD resources                                                            [ d
(r0) 0: Failure: (112) Meta device too small.
[r0] cmd /sbin/drbdsetup 0 disk /dev/sda3 /dev/sda3 internal --set-defaults --create-device  failed - continuing!
s(r0) n(r0) ]
セカンダリでも気になるエラーらしいもの「device failed – continuing!」が出ている。
casey@drbd24:~$ sudo /etc/init.d/drbd start
 * Starting DRBD resources                                                            [ d
(r0) 0: Failure: (112) Meta device too small.
[r0] cmd /sbin/drbdsetup 0 disk /dev/sda3 /dev/sda3 internal --set-defaults --create-device  failed - continuing!
s(r0) n(r0) ]..........
 ***************************************************************
 DRBD's startup script waits for the peer node(s) to appear.
 - In case this node was already a degraded cluster before the
 reboot the timeout is 60 seconds. [degr-wfc-timeout]
 - If the peer was available before the reboot the timeout will
 expire after 15 seconds. [wfc-timeout]
 (These values are for resource 'r0'; 0 sec -> wait forever)
 To abort waiting enter 'yes' [  14]:
 [ OK ]
でも再実行したらOK とでた。エラーも出てるけど。
プライマリに昇格
casey@drbd23:~$ sudo drbdadm -- --overwrite-data-of-peer primary all
 0: State change failed: (-2) Need access to UpToDate data
 Command 'drbdsetup 0 primary --overwrite-data-of-peer' terminated with exit code 17
初期状態ではセカンダリになっているらしいので、プライマリとして構築したほうを強制的にプライマリにする。
root@ubuntu-1:~# fdisk -l | grep vda
 Disk /dev/vda: 314 MB, 314572800 bytes
 /dev/vda1               1         609      306904+  83  Linux
を参考に
casey@drbd23:~$ sudo fdisk -l | grep sda3
 /dev/sda3       207620096   207622141        1023   83  Linux
としてみるが、小さいっぽい。気にはなっていたけれど・・。
Disk /dev/sda: 107.4 GB, 107374182400 bytes
 255 heads, 63 sectors/track, 13054 cylinders, total 209715200 sectors
 Units = sectors of 1 * 512 = 512 bytes
 Sector size (logical/physical): 512 bytes / 512 bytes
 I/O size (minimum/optimal): 512 bytes / 512 bytes
 Disk identifier: 0x0000147e
Device Boot      Start         End      Blocks   Id  System
 /dev/sda1   *        2048    23300095    11649024   83  Linux
 /dev/sda2       207622142   209713151     1045505    5  Extended
 /dev/sda3        23300096   207622141    92161023   83  Linux
 /dev/sda5       207622144   209713151     1045504   82  Linux swap / Solaris
Partition table entries are not in disk order

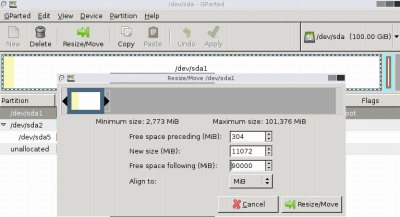
このへんから記憶が曖昧だ・・。fdisk やその辺の使い方がよくわかっていないこともあって、たぶんGparted を使ったような気がする。
casey@drbd24:~$ sudo partprobe
 casey@drbd24:~$ sudo drbdadm create-md r0
 strange bm_offset -72 (expected: -5696)
 strange bm_offset -72 (expected: -5696)
 Writing meta data...
 initializing activity log
 NOT initialized bitmap
 New drbd meta data block successfully created.

casey@drbd24:~$ sudo /etc/init.d/drbd start
 * Starting DRBD resources                                                            [ d
(r0) s(r0) n(r0) ].                                                         [ OK ]
casey@drbd23:~$ sudo drbdadm -- --overwrite-data-of-peer primary all
 Command 'drbdsetup 0 primary --overwrite-data-of-peer' did not terminate within 121 seconds
ext4 にしてみる
 casey@drbd23:~$ sudo mkfs.ext4 /dev/drbd0
 mke2fs 1.42 (29-Nov-2011)
 mkfs.ext4: Wrong medium type while trying to determine filesystem size
マウントしてみる
casey@drbd23:~$ sudo mount /dev/drbd0 /mnt/srv
 mount: mount point /mnt/srv does not exist
 casey@drbd23:~$ sudo mkdir /mnt/srv
 casey@drbd23:~$ sudo mount /dev/drbd0 /mnt/srv
 mount: block device /dev/drbd0 is write-protected, mounting read-only
 mount: Wrong medium type
状態を表示させてみる

Every 1.0s: cat /proc/drbd                                    Fri Oct 19 14:23:59 2012

version: 8.3.11 (api:88/proto:86-96)
 srcversion: 71955441799F513ACA6DA60
 0: cs:SyncTarget ro:Secondary/Primary ds:Inconsistent/UpToDate C r-----
 ns:0 nr:60564296 dw:60564040 dr:0 al:0 bm:3662 lo:2 pe:944 ua:2 ap:0 ep:1 wo:f oos
 :32041924
 [============>.......] sync'ed: 65.3% (31288/89996)Mfinish: 0:05:11 speed: 102
 ,956 (88,928) want: 102,400 K/sec

あれ?同期してる。よくわからないけれど、同期しているらしい。
Every 1.0s: cat /proc/drbd                                    Fri Oct 19 14:29:21 2012

version: 8.3.11 (api:88/proto:86-96)
 srcversion: 71955441799F513ACA6DA60
 0: cs:Connected ro:Secondary/Primary ds:UpToDate/UpToDate C r-----
 ns:0 nr:92605964 dw:92605964 dr:0 al:0 bm:5625 lo:0 pe:0 ua:0 ap:0 ep:1 wo:f oos:0
同期完了したらしい。
うーん。。。コイツは難しそうだ。もう少し勉強せねば。
#(注)GlusterFS につて、前回の調査では、IP アドレスに関して単一障害点になりそうだ、ということだったが、これも解決できる方法を見つけた。後日記載する
参考文献
- DRBD
- スプリットブレインからの手動回復
- blog.shiten.info » drbd を使ってみる – Ubuntu Server 12.04 LTS
- lost and found ( for me ? ): Ubuntu 10.04 TLS : DRBD
- DRBD.jp by Thirdware inc.
- ウノウラボ by Zynga Japan: DRBDで2TBのハードディスク容量を使う方法
- partprobe Linuxコマンドリファレンス
- Linuxコマンド集 – 【 fdisk 】 ハード・ディスクのパーティションを設定する:ITpro


コメント